Running OpenCode with Local LLMs on an M3 Ultra 512GB


1. Introduction
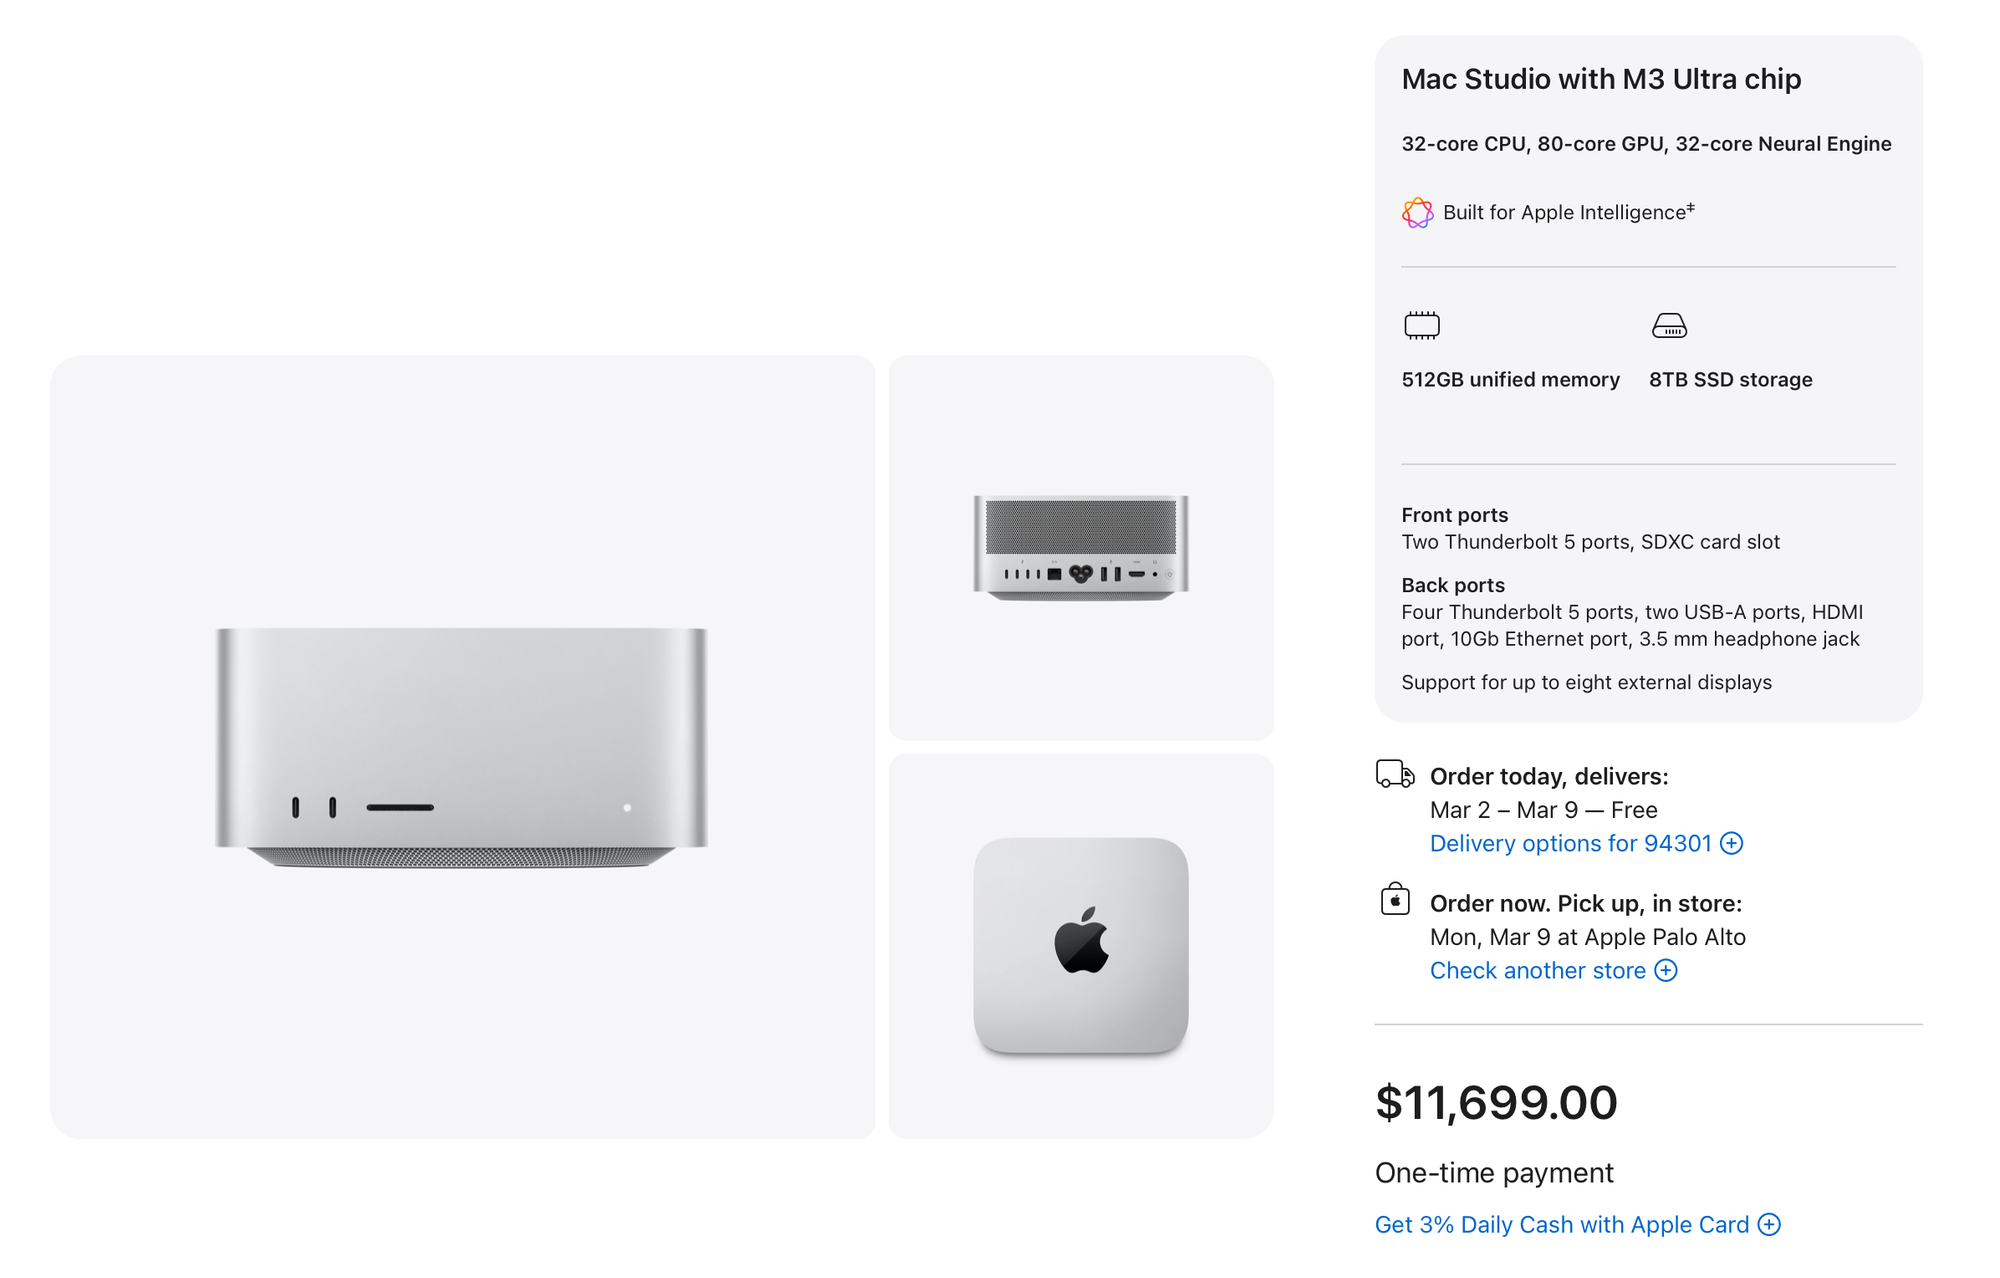
Last year, I spent some time thinking about how to invest the incentives from my previous employer. Instead of putting everything into stocks or something more conventional, I ended up buying a personal desktop machine with unusual power: a Mac Studio M3 Ultra with 512GB of memory and an 8TB SSD. It was an expensive decision, well almost $12,000, and on paper it didn’t look very reasonable. But at the time, it felt like the right kind of unreasonable.
This post is also available on Medium. If you’re a paid Medium member and happen to read it there, it helps fund my next cup of coffee. Much appreciated ☕️😄
One practical motivation was privacy. These days, many companies install various forms of monitoring or management software on work machines. I didn’t want my personal experiments, side projects, or random explorations to exist inside that kind of environment. I wanted a truly personal machine where I could work freely, without worrying about corporate policies or invisible background processes. That alone was enough to justify having a separate system.
Still, if I’m being honest, privacy wasn’t the whole story. What really pushed me toward this particular configuration was the memory. 512GB of unified memory is not something most people need. For normal development, photo editing, video editing, or even most machine learning tasks, it’s massive overkill. It only starts to make sense in very specific situations, and for me that situation was running large language models locally.
Around that time, I had been watching many videos by Alex Ziskind, who is well known for testing and benchmarking local LLM setups. His channel is largely focused on experimenting with large models and comparing how different hardware configurations perform. He often uses powerful NVIDIA-based systems, but what caught my attention even more were his tests with Mac Studios, especially the 512GB models.
I’ve been using Macs for a long time. I haven’t seriously used a Windows PC in more than 15 years, and I didn’t have much desire to go back. Managing GPU drivers, CUDA versions, OS compatibility issues, and hardware quirks is something I’ve already done before. It can be interesting, even fun at times, but it also eats up time and mental energy. So when I saw Alex comparing large Mac Studio setups with NVIDIA-based systems, the idea of a Mac Studio with 512GB of memory as a local LLM machine started to sound, somewhat unexpectedly, reasonable. I ended up getting one.
This was around May 2025. At the time, I was particularly interested in models like DeepSeek R1 and the rapidly growing open-source LLM ecosystem, and I wanted to see how far I could push local inference on Apple Silicon. Unfortunately, that curiosity overlapped with my onboarding at a new company, and most of my energy went into learning new systems, processes, and people. I didn’t have much room left to explore local LLM tooling, so I took the easiest route. I installed Ollama, connected it to Open WebUI, and tried running a few models locally. It worked, and it was fun, and seeing a large model respond entirely on my own machine still felt a bit magical. But beyond that initial experimentation, I didn’t use it very much. The performance didn’t quite live up to my expectations, and in practice, using ChatGPT Plus for $20 a month was simply easier and more reliable, without requiring me to think about memory limits, model formats, or hardware details.
For quite a while, that became the steady state. The Mac Studio clearly had a lot of potential, but it wasn’t really part of my daily workflow. Running a few local models was interesting, but it didn’t change how I worked day to day. Most of my real work still happened in the cloud, and the machine mostly sat there, waiting for a reason to justify its existence. That reason only started to appear much later, toward the end of last year, when coding agents like Claude Code suddenly became impossible to ignore. Almost overnight, they went from being a curiosity to something that was clearly changing how software was written. I had to admit, somewhat reluctantly, that in many cases they were already implementing code better than me. That realization pushed me to stop thinking in terms of competition and start thinking about survival, and eventually cooperation. I began experimenting more seriously with OpenCode and other local setups, trying to understand how to work with these agents in a way that felt sustainable. That was when the original idea—turning this Mac into a real local AI workstation—finally began to make sense in a practical way.
What follows is how I ended up designing and setting up my OpenCode environment with local LLMs on this Mac Studio, focusing mostly on the basic concepts rather than exhaustive tuning or optimization. None of it is presented as the “right” way to do things, but it’s what worked for me, and I hope it’s useful to others who are exploring similar ideas.
2. Know Your Machine
When people hear that this machine cost around $12,000 ($11,699 before tax, and comfortably over $12K in many places) the reaction is usually the same. It sounds like an all-mighty, no-compromise setup. In reality, it isn’t. But it is very specifically optimized for others, and understanding that is the key to having the right expectations.
I’ve heard people say that the Mac Studio is a bad choice for local LLMs because it’s “slow.” I don’t fully agree with that, but I also don’t think the claim comes out of nowhere. It’s a half-truth that usually comes from focusing on the wrong dimension. The real differentiator here is not raw speed, but capacity.
Local LLM performance is constrained by three things: 1) whether the model fits in fast memory at all, 2) how quickly data can move from memory to the GPU, and 3) how much power the system needs to do this continuously. Most discussions fixate on the second point. The Mac Studio’s real advantage is the first (and the third).
The M3 Ultra gives you up to 512GB of unified memory. That fundamentally changes what “local” means. Models that simply do not fit on most consumer GPUs (even RTX 5090)—70B, 100B, 405B, and beyond—can sit entirely in fast memory on the single Mac Studio with 512GB RAM. There’s no sharding across GPUs, no offloading to slow system RAM, and no juggling processes just to keep the model alive. You load the whole thing, once, and it stays there.
On paper, the M3 Ultra’s memory bandwidth is around 820 GB/s. That’s clearly slower than an RTX 5090 at roughly 1,800 GB/s, and far slower than data-center GPUs like the H100 or H200. But bandwidth only matters after the model fits. An RTX 5090 has about 32GB of VRAM. Even moderately large models push it past its limits unless you heavily quantize or spill into system memory, which is where performance collapses. The Mac avoids that failure mode entirely by brute-forcing the problem with memory.
In practice, the more meaningful limitation is compute (GPU). The M3 Ultra’s GPU isn’t slow in absolute terms—it’s quite capable—but it’s not built to compete with NVIDIA GPUs that are designed almost entirely around massive parallel compute and tensor throughput. When people say the Mac feels slow for LLMs, what they’re usually experiencing is lower token throughput, not memory starvation. That distinction matters.
Capacity also intersects directly with power. Under sustained heavy load, the Mac Studio M3 Ultra typically draws around 200 to 300 watts. You do hear the fans—frankly, it’s not that Mac-silent when we run heavy local LLMs—but the noise is steady and contained, more like a serious workstation than a server. I’ve actually come to find that sound useful: when the fans finally settle down, I know a long-running job has finished without checking anything.
Compare that to NVIDIA-based systems that can hold similarly large models. An RTX 5090 draws roughly 450 watts on its own, and you would need many of them to approach 512GB of usable GPU memory. Even a much smaller multi-GPU setup quickly pushes total system power into the kilowatt range once CPUs, cooling, and overhead are included. Data-center cards make this even more extreme: a single H100 or H200 typically pulls 700–1,000 watts, and running very large models usually requires multiple cards (an H100 has (only) 80GB HBM3, and an H200 has 141GB HBM3e) linked together, putting total draw somewhere between 2 and 4 kW. There’s also a very practical cost angle. At typical U.S. electricity prices, running a 300-watt machine continuously costs roughly $25–30 a month (though depending on region). A multi-kilowatt GPU system can easily exceed $150 a month, before you even think about heat, noise, or the hardware itself. That difference doesn’t matter much for short benchmarks, but it matters a lot if you want to keep a machine running for hours every day.
This is why I don’t find the claim that “Mac Studios are not for LLMs” very satisfying. Yes, the M3 Ultra is slower at generating tokens than high-end NVIDIA GPUs, largely because of GPU compute differences rather than memory alone. But it can run entire, very large models locally, in one box, at a few hundred watts, without sounding like a jet engine or turning the room into a heat sink. That combination is rare.
Once I started thinking of this Mac Studio not as a speed monster, but as a high-capacity, power-efficient local research machine, the trade-offs made much more sense. It’s not cheap, and it’s not silent, but it fits under a desk and lets you work with models that would otherwise live exclusively in the cloud.
3. Getting Models
While I use Ollama for model management, its official library can be misleading. Some models listed there, like early versions of Kimi or GLM, default to the “Cloud” mode because the local weights were either not released at the time or simply too massive for standard downloads. If you didn’t already know that background, it was easy to assume those models were never meant to run locally in the first place.
The landscape has changed since then. Companies like Moonshot AI and Zhipu have started releasing open-weight versions of their flagship models, including releases such as Kimi K2.5 and GLM-4.7. Once those weights exist, the limitation is no longer legal or philosophical; it becomes technical.
This is where Hugging Face becomes essential, but also slightly tricky. Hugging Face usually hosts the original, unmodified model weights exactly as released by the vendors. In many cases, those releases are intended to be run with specific inference runtimes, most commonly vLLM. That works well on NVIDIA GPUs, but vLLM is not practically available on Apple Silicon today, which means those “official” model releases are often unusable on a Mac as-is, even if you have enough memory.
That gap is filled by optimization groups like Unsloth. They take the raw weights from Hugging Face, apply quantization and layout changes, and convert them into formats such as GGUF. This step is what turns an open-weight release into something that can actually run locally on a Mac. Once a model is available in GGUF form, engines like llama.cpp (the engine underneath Ollama) can load it entirely on Apple Silicon.
This is why some models appear “cloud-only” in one place but become perfectly usable locally elsewhere. The constraint isn’t the model itself, but the runtime it expects. With the right conversion and enough memory, even models that were originally designed for large NVIDIA clusters can run entirely on a personal machine.
A concrete example makes this much easier to explain. If you look up GLM-4.7 on Hugging Face, you’ll find GGUF builds published by Unsloth. These are the same models released by Zhipu, but converted and quantized into formats that are actually usable for local inference.
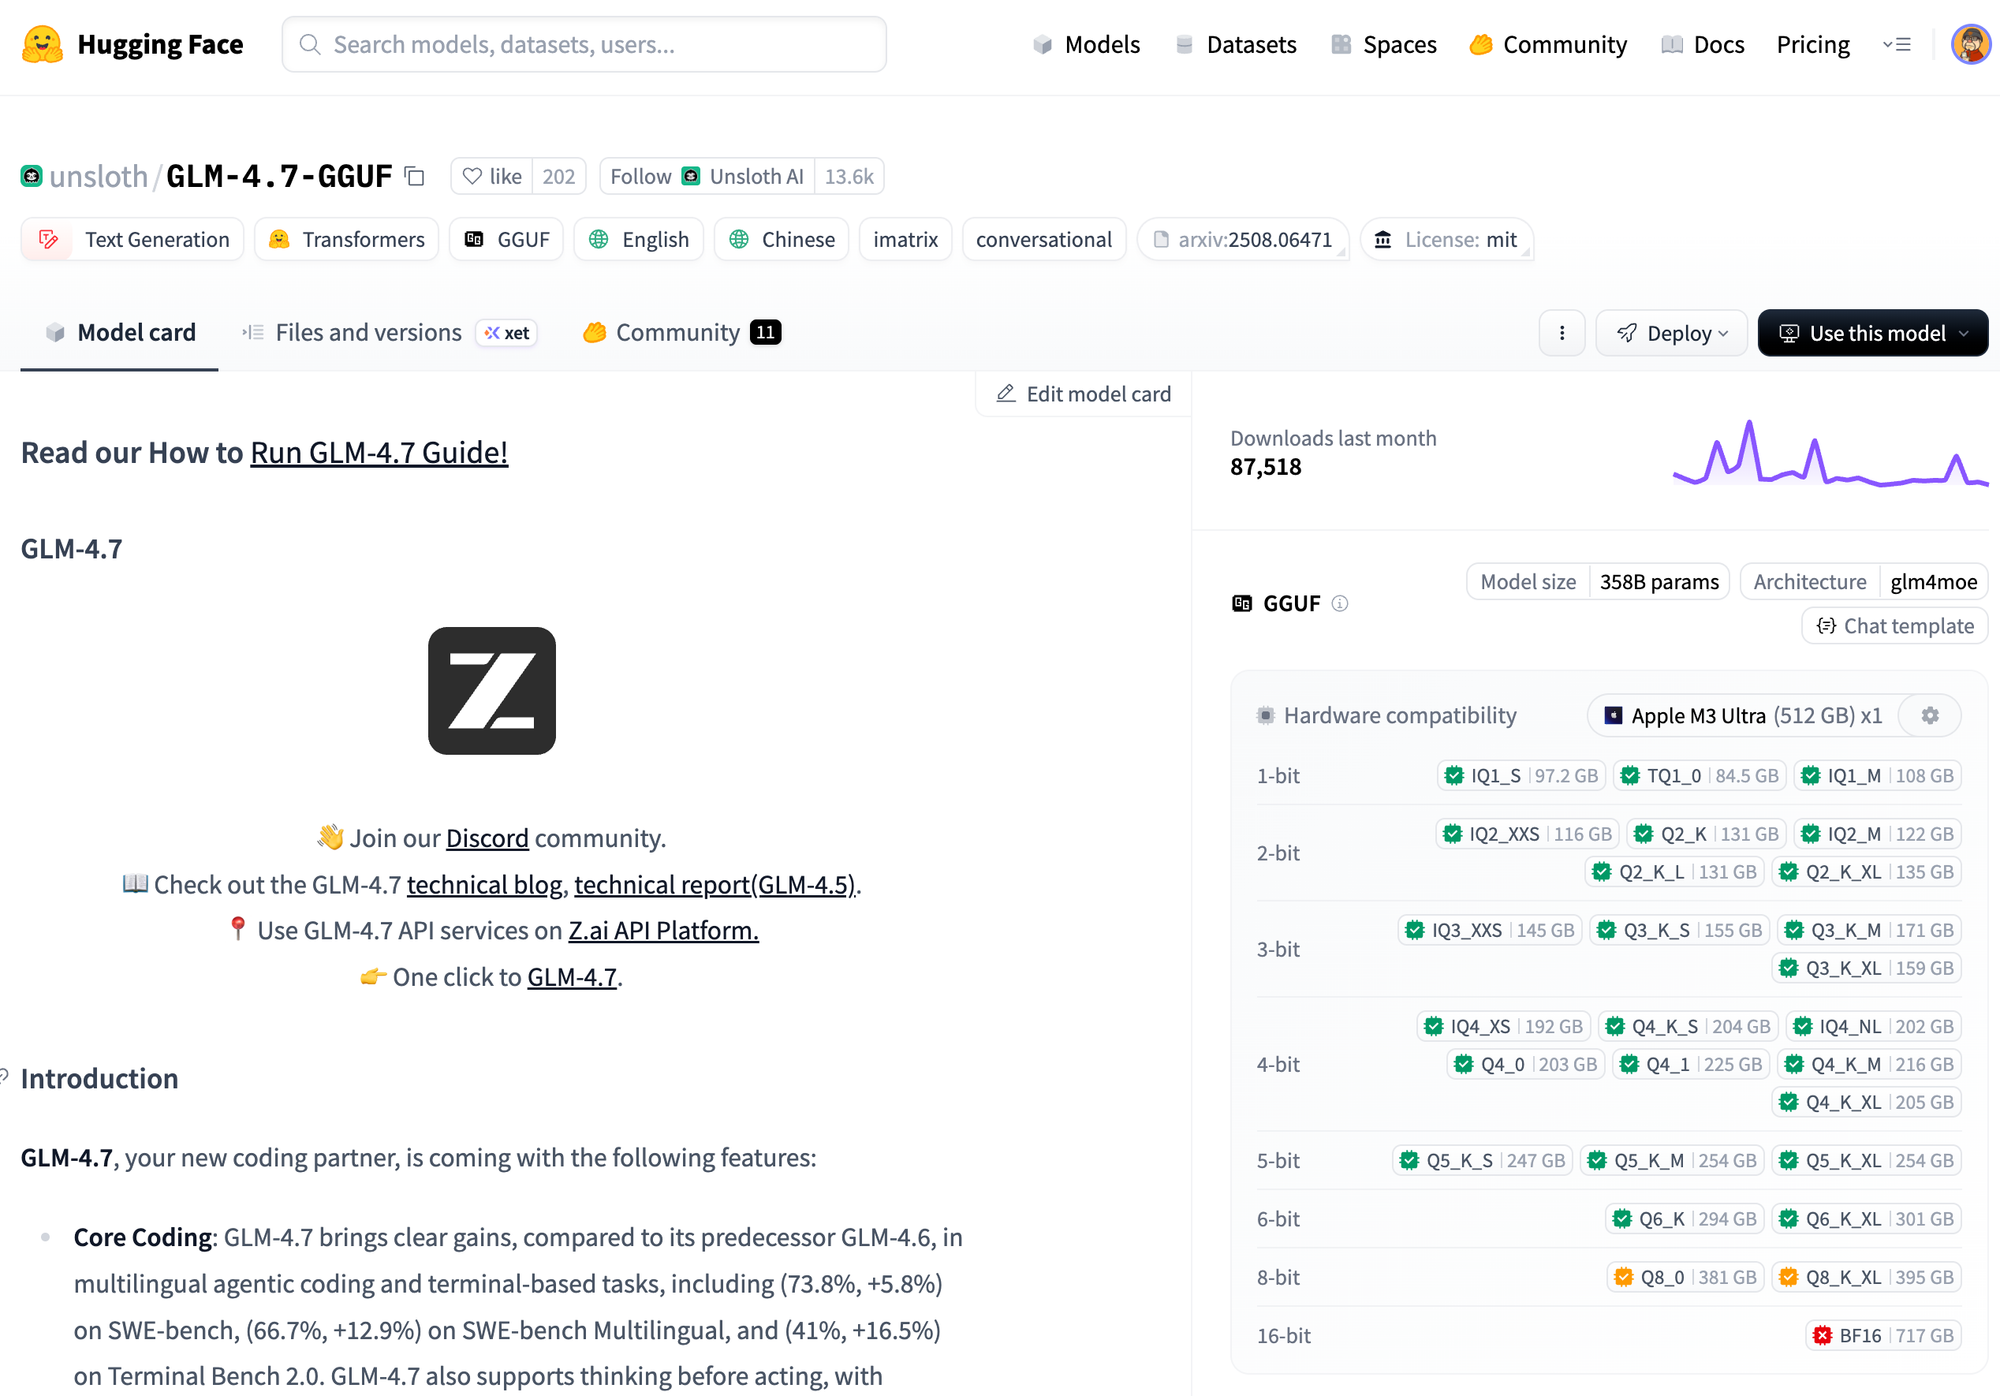
One feature that’s surprisingly helpful here is Hugging Face’s hardware awareness. If you register your machine, the site will show a simple feasibility chart for each model variant, based on parameter count and quantization level. In my case, with an Apple M3 Ultra and 512GB of memory, the 6-bit ML variant shows up as a comfortable fit. That visual feedback alone saves a lot of guesswork and failed downloads.
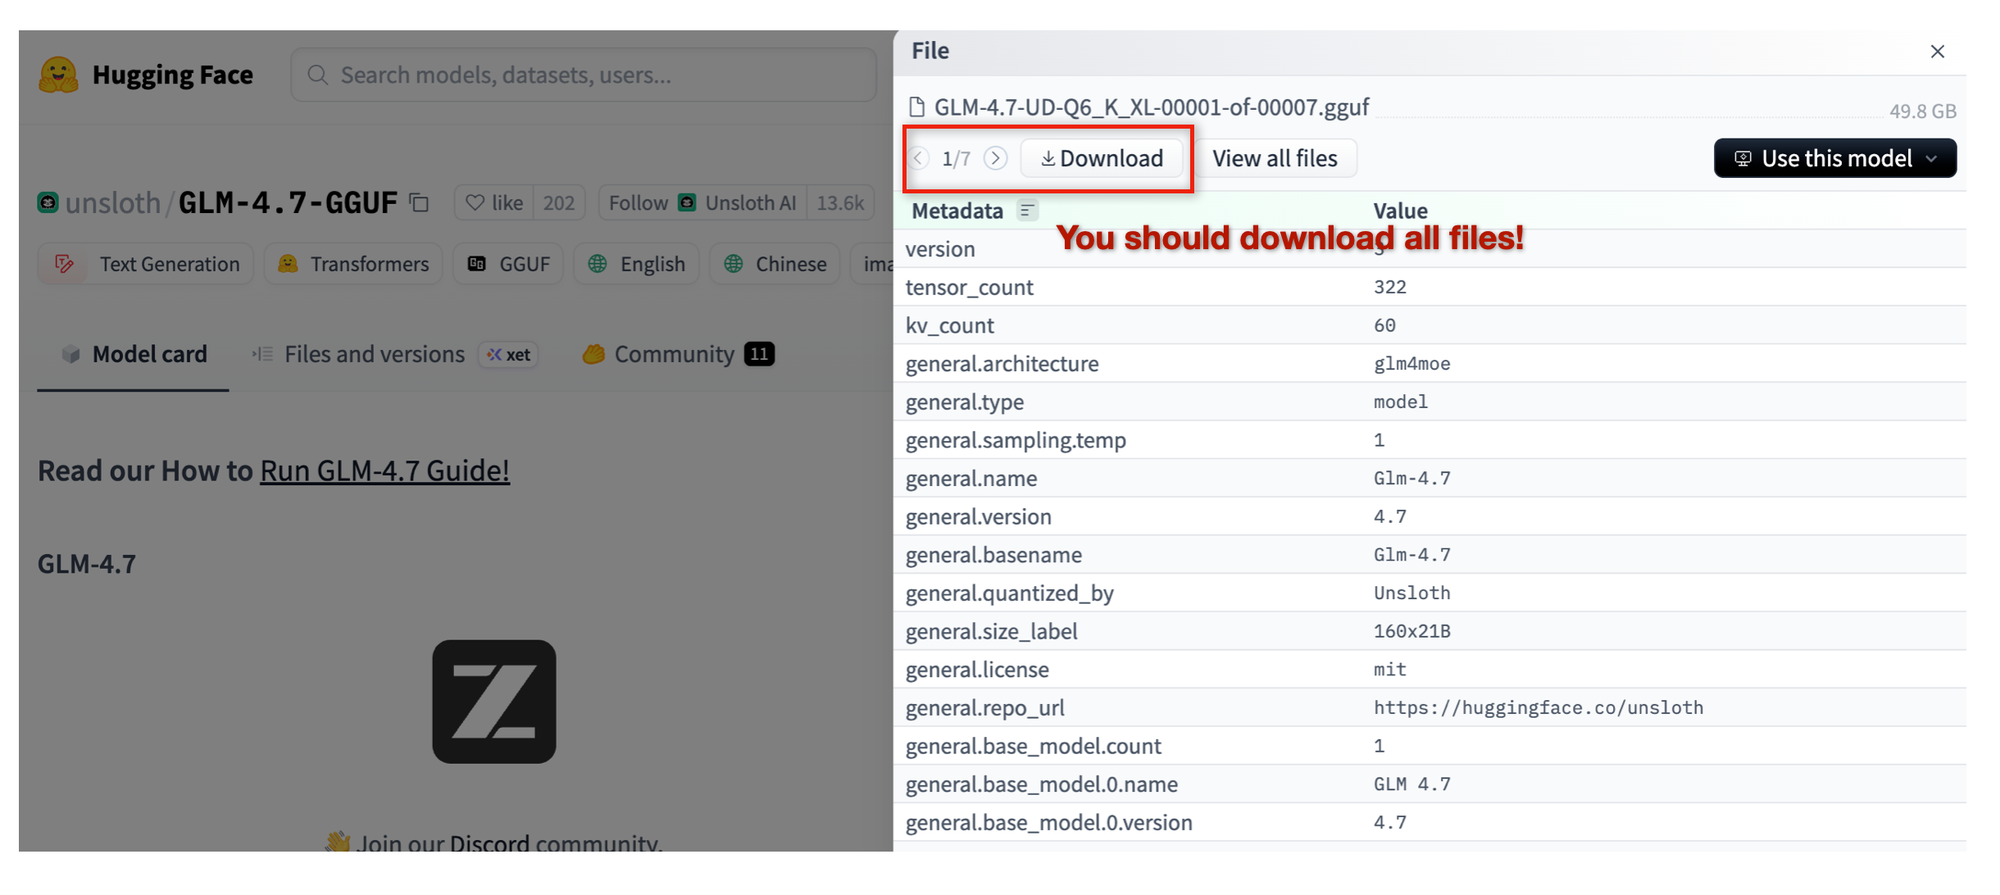
Once you click into a specific model variant, you can download the actual GGUF files directly. One thing that’s easy to miss at first is that many large models are distributed as shards, meaning multiple GGUF files instead of a single one. You need all of them for the model to load correctly. Missing even one shard usually results in a confusing error later, which feels unnecessary once you know what to look for.
This is where storage quietly becomes part of the system design. An 8TB (if not 16TB) internal SSD stops feeling excessive very quickly if you’re experimenting seriously with large models. You can use fast external storage, including Thunderbolt 5 drives, but in practice that adds friction—extra cables, sleep issues, and one more moving part. Keeping active models on internal storage turns out to be much more comfortable, while external drives work better as overflow or archive space.
At that point, the setup feels less like downloading a file and more like curating a local library. Memory determines what you can run, but disk space determines what you can keep around long enough to actually learn from it.
4. Step 1: Preparation
Below is a brief overview of how I set up my local environment.
4.1 Install Core Tools
Run this in your terminal to get the necessary engines (I assume you already installed Homebrew).
# 1. Install Homebrew packages
brew install llama.cpp tmux node bun

# 2. Install OrbStack (if not already installed, you need a Docker runtime)
brew install --cask orbstack
4.2 Directory Structure
I keep all model-related files under ~/dev/ai/models to keep paths consistent and avoid accidental typos. Your setup may differ, but this structure has worked well for me.
Create a clean home for your LLM models
mkdir -p ~/dev/ai/models/gguf/glm-4.7
mkdir -p ~/dev/ai/models/gguf/kimi-k2.5
mkdir -p ~/dev/ai/models/gguf/qwen3-coder
~/dev/ai/models/
├── launch.py # <--- THE MASTER SCRIPT
└── gguf/
├── kimi-k2.5/ # Folder per model
│ ├── config.toml # The specific settings for Kimi
│ └── Kimi-K2.5-Q2_K_L-00001-of-00008.gguf
│ └── ... # The actual large file(s)
├── glm-4.7/
│ ├── config.toml
│ └── GLM-4.7-Q6_K-00001-of-00006.gguf
│ └── ... # The actual large file(s)
└── qwen3-coder/
├── config.toml
└── Qwen3-Coder-Next-BF16-00001-of-00004.gguf
└── ... # The actual large file(s)
Create a folder for your docker image.
mkdir -p ~/dev/ai/docker-images4.3 Download and Place Models
The goal of this setup is to run multiple local models and assign them to different OpenCode / oh-my-opencode agents. For this purpose, I’m using GLM-4.7 (Q6), Kimi-K2.5 (Q2), and Qwen3-Coder-Next (BF16).
Move your downloaded .gguf files (you need all shard files) into their respective folders:
- Kimi:
~/dev/ai/models/gguf/kimi-k2.5/ - GLM:
~/dev/ai/models/gguf/glm-4.7/ - Qwen:
~/dev/ai/models/gguf/qwen3-coder/
5. Step 2: The “Brain” Infrastructure
5.1 Create Model Configs
Create a config.toml file inside each model folder. It will be used when you run each LLM model.
A. For Planner(main) Agent (GLM-4.7) at Port 8081
- File:
~/dev/ai/models/gguf/glm-4.7/config.toml
[server]
# The specific GGUF file to run inside this folder
model_file = "GLM-4.7-Q6_K-00001-of-00006.gguf"

# Hardware Settings
n_gpu_layers = 99
ctx_size = 131072
threads = 24

# Network Settings
port = 8081
host = "0.0.0.0"

# Optional: Set a friendly alias for tools like OpenCode
alias = "glm"
B. For Oracle Agent (Kimi-K2.5) at Port 8080
- File:
~/dev/ai/models/gguf/kimi-k2.5/config.toml
[server]
# The specific GGUF file to run inside this folder
model_file = "Kimi-K2.5-Q2_K_L-00001-of-00008.gguf"

# Hardware Settings
n_gpu_layers = 99
ctx_size = 131072
threads = 24

# Network Settings
port = 8080
host = "0.0.0.0"

# Optional: Set a friendly alias for tools like OpenCode
alias = "kimi"
C. For Coder Agent (Qwen3-Coder-Next) at Port 8082
- File:
~/dev/ai/models/gguf/qwen3-coder/config.toml
[server]
# The specific GGUF file to run inside this folder
model_file = "Qwen3-Coder-Next-BF16-00001-of-00004.gguf"

# Hardware Settings
n_gpu_layers = 99
ctx_size = 131072
threads = 24

# Network Settings
port = 8082
host = "0.0.0.0"

# Optional: Set a friendly alias for tools like OpenCode
alias = "qwen3-coder"
5.2 Create the Master Launcher
- File:
~/dev/ai/models/launch.py
#!/usr/bin/env python3
import os
import sys
import argparse
import tomllib  # Requires Python 3.11+ (Standard on macOS Sonoma/Sequoia)
import subprocess

# --- CONFIGURATION ---
BASE_DIR = os.path.dirname(os.path.abspath(__file__))
GGUF_DIR = os.path.join(BASE_DIR, "gguf")


def load_config(model_name):
    # 1. Locate the folder
    model_path = os.path.join(GGUF_DIR, model_name)
    config_file = os.path.join(model_path, "config.toml")

    if not os.path.exists(config_file):
        print(f"X Error: Config file not found at {config_file}")
        sys.exit(1)

    # 2. Parse TOML
    with open(config_file, "rb") as f:
        config = tomllib.load(f)

    return config, model_path


def build_command(config, model_path):
    server_conf = config.get("server", {})

    # 1. Find the .gguf file
    gguf_name = server_conf.get("model_file")
    if not gguf_name:
        print("X Error: 'model_file' missing in config.toml")
        sys.exit(1)

    full_model_path = os.path.join(model_path, gguf_name)

    # 2. Build the llama-server command
    cmd = ["llama-server"]

    # Map TOML keys to CLI flags
    # Key = TOML key, Value = CLI flag
    args_map = {
        "model_file": "-m",  # We handle the path manually, but good for ref
        "n_gpu_layers": "--n-gpu-layers",
        "ctx_size": "--ctx-size",
        "threads": "--threads",
        "port": "--port",
        "host": "--host",
        "alias": "--alias",
    }

    cmd.extend(["-m", full_model_path])

    for key, value in server_conf.items():
        if key == "model_file":
            continue  # Already added

        flag = args_map.get(key)
        if flag:
            cmd.extend([flag, str(value)])

    return cmd


def main():
    parser = argparse.ArgumentParser(description="Launch a local LLM from config.")
    parser.add_argument("model", help="The name of the folder inside gguf/")
    args = parser.parse_args()

    print(f">> Loading configuration for: {args.model}...")
    config, path = load_config(args.model)

    cmd = build_command(config, path)

    print(f"> Context: {path}")
    print(f"> Command: {' '.join(cmd)}")
    print("-" * 40)

    try:
        # Run and replace the python process (saves memory/PID handling)
        os.execvp("llama-server", cmd)
    except FileNotFoundError:
        print("X Error: 'llama-server' not found in PATH.")
        print("   Run: brew install llama.cpp")


if __name__ == "__main__":
    main()
5.3 How to use it
Make the script executable (and make an alias for convenience).
chmod +x ~/dev/ai/models/launch.py

# Add this to your ~/.zshrc for convenience
alias llm="python3 ~/dev/ai/models/launch.py"
Reload zsh
source ~/.zshrcPlease note that I'm assuming you're using zsh. If you're using a different shell, please adjust it accordingly.
Run any model by its folder name
llm kimi-k2.56. Step 3: The “Hands” (Agent Sandbox)
At this point, you can configure OpenCode/oh-my-opencode to use these local LLMs for each agent. It’s important, however, to run the agents themselves inside a sandbox. The LLMs only generate text and run in your main system; they don’t directly modify anything. The real risk comes from agents that execute commands or write files. Without isolation, a bad prompt, a bug, or a simple misunderstanding could result in destructive commands such as rm -rf / being executed on your actual system.
This matters even more because oh-my-opencode is intentionally persistent. In many cases, it won’t stop easily, and that stubbornness is often what makes it useful—it keeps pushing until a task is truly done. Running it inside a safe, isolated environment lets it operate freely without constant supervision, which turns that persistence into a productivity advantage rather than a liability.
In practice, setting up this kind of sandbox for commercial agent systems like Claude can be tricky because of authentication and integration constraints. With local agents, however, the process is much more straightforward.
6.1 Visual Safety Config (Starship)
First, we set up a Starship configuration file. Starship is a lightweight, cross-shell prompt that I prefer for its simplicity and predictability. In this setup, the configuration is intentionally minimal, but with one important behavior: when the shell is running inside a Docker container, the prompt turns red. This provides an immediate visual signal that I’m operating inside a sandboxed environment, reducing the risk of confusing it with my host system.
Create a config file that forces the terminal prompt to turn RED when you are inside Docker.
- File:
~/dev/ai/docker-images/starship.toml
# Use a Red Whale to indicate "Inside Container"
[container]
format = '[$symbol $name]($style) '
symbol = "🐳 "
style = "red bold"

# Turn the arrow red to warn you
[character]
success_symbol = "[➜](red bold)"
error_symbol = "[✗](red bold)"

# Disable the package version noise for cleaner look
[package]
disabled = true
6.2 The Dockerfile for Agents
Next, we create a Dockerfile that defines the execution environment for the agents. The goal is to give them everything they need to run and modify code, while keeping those actions fully contained inside the container. By standardizing this environment, we can let the agents operate freely without risking unintended changes to my host system.
- File:
~/dev/ai/docker-images/Dockerfile.agent
FROM python:3.12-slim

# 1. Install System Tools
# Added pkg-config and libssl-dev (Essential for Rust compilation)
RUN apt-get update && apt-get install -y \
    git curl build-essential unzip sudo \
    ffmpeg jq zsh pkg-config libssl-dev \
    && rm -rf /var/lib/apt/lists/*

# 2. Install Starship & Aliases
RUN curl -sS https://starship.rs/install.sh | sh -s -- -y
RUN echo 'eval "$(starship init zsh)"' >> /root/.zshrc
RUN echo 'alias ll="ls -al"' >> /root/.zshrc
# Shortcuts for new tools
RUN echo 'alias c="cargo"' >> /root/.zshrc
RUN echo 'alias g="go"' >> /root/.zshrc

# 3. Install 'uv' (Python)
COPY --from=ghcr.io/astral-sh/uv:latest /uv /bin/uv

# 4. Install Bun (JS/TS)
ENV BUN_INSTALL="/root/.bun"
ENV PATH="$BUN_INSTALL/bin:$PATH"
RUN curl -fsSL https://bun.sh/install | bash

# --- NEW SECTION: RUST SETUP ---
# 5. Install Rust (Official Script)
# Installs Cargo, Rustc, Rustfmt, etc.
ENV RUSTUP_HOME=/root/.rustup
ENV CARGO_HOME=/root/.cargo
ENV PATH="$CARGO_HOME/bin:$PATH"
RUN curl --proto '=https' --tlsv1.2 -sSf https://sh.rustup.rs | sh -s -- -y --profile default

# --- NEW SECTION: GO SETUP ---
# 6. Install Go (Latest Stable)
# We target 'linux-arm64' because you are on Apple Silicon (M3).
ARG GO_VER=1.23.4
RUN curl -OL https://golang.org/dl/go${GO_VER}.linux-arm64.tar.gz && \
    tar -C /usr/local -xzf go${GO_VER}.linux-arm64.tar.gz && \
    rm go${GO_VER}.linux-arm64.tar.gz
ENV PATH="/usr/local/go/bin:$PATH"

# 7. Install OpenCode CLI
RUN curl -fsSL https://opencode.ai/install | bash
ENV PATH="/root/.opencode/bin:$PATH"

# 8. Install Oh-My-OpenCode
RUN bunx oh-my-opencode@latest install --no-tui \
    --claude=no --gemini=no --copilot=no

# 9. CONFIG PART 1: Hardware/Providers (opencode.json)
# Maps your local ports to providers.
RUN mkdir -p /root/.config/opencode && \
cat <<EOF > /root/.config/opencode/opencode.json
{
  "plugin": ["oh-my-opencode"],
  "theme": "oh-my-opencode",
  "default_agent": "Sisyphus",
  "provider": {
    "local-planner": {
      "npm": "@ai-sdk/openai-compatible",
      "name": "GLM 4.7 (Planner)",
      "options": { "baseURL": "http://host.docker.internal:8081/v1" },
      "models": { "glm": { "name": "GLM 4.7" } }
    },
    "local-oracle": {
      "npm": "@ai-sdk/openai-compatible",
      "name": "Kimi K2.5 (Context)",
      "options": { "baseURL": "http://host.docker.internal:8080/v1" },
      "models": { "kimi": { "name": "Kimi K2.5" } }
    },
    "local-coder": {
      "npm": "@ai-sdk/openai-compatible",
      "name": "Qwen3 Next (Coder)",
      "options": { "baseURL": "http://host.docker.internal:8082/v1" },
      "models": { "qwen": { "name": "Qwen3 Next" } }
    }
  }
}
EOF

# 10. CONFIG PART 2: Agent Brains (oh-my-opencode.json)
# Maps Agent Roles to Providers.
RUN cat <<EOF > /root/.config/opencode/oh-my-opencode.json
{
  "agents": {
    "sisyphus": { "model": "local-planner/glm" },
    "oracle": { "model": "local-oracle/kimi" },
    "librarian": { "model": "local-oracle/kimi" },
    "build": { "model": "local-coding/qwen" }
  },
  "disabled_agents": ["multimodal-looker"],
  "confirm_dangerous_actions": false
}
EOF

WORKDIR /workspace
ENV SHELL=/bin/zsh
CMD ["/bin/zsh"]
6.3 Build the Docker Image
cd ~/dev/ai/docker-images
docker build -t smart-agent -f Dockerfile.agent .
6.4 Setup Convenience Command
This gives you a shell command called agent, which launches the Docker container with your current directory mounted as the workspace directory inside the container. The Docker image also caches common development dependencies (currently Go, Python, Rust, and Bun) so they don’t need to be downloaded repeatedly each time the container starts.
Add this to your ~/.zshrc on your Mac:
# --- AI Agent Launcher (The "Brain Box") ---
function agent() {
    # 1. Determine Workspace
    local TARGET_DIR="${1:-$PWD}"

    # 2. Generate Unique Name
    local CONTAINER_NAME="opencode-agent-$(basename "$TARGET_DIR")"

    echo "> Launching Smart Agent: $CONTAINER_NAME"
    echo "> Workspace: $TARGET_DIR"

    docker run -it --rm \
        --name "$CONTAINER_NAME" \
        --add-host=host.docker.internal:host-gateway \
        -v "$TARGET_DIR:/workspace" \
        -v "$HOME/dev/ai/docker-images/starship.toml:/root/.config/starship.toml" \
        -v opencode-cargo-cache:/root/.cargo \
        -v opencode-go-cache:/root/go \
        -v opencode-bun-cache:/root/.bun \
        -v opencode-uv-cache:/root/.cache/uv \
        -v opencode-pip-cache:/root/.cache/pip \
        -v opencode-history:/root/.history \
        -e HISTFILE=/root/.history/zsh_history \
        -w /workspace \
        smart-agent \
        zsh
}
Reload the shell
source ~/.zshrc7. How to Work
7.1 Launch All LLM Models
llm glm-4.7
llm kimi-k2.5
llm qwen3-coder
Leave this running. It starts with ports 8080, 8081, 8082
I prefer running each LLM model in its own tmux pane, which makes it easier to monitor and manage them side by side.
7.2 Start Working
It's now so simple. Open a new terminal, go to your project folder, and type agent.
cd ~/dev/workspace
agent
Docker will mount the folder to the container's /workspace folder.
7.3 Inside the Container
- Check the Prompt is RED 🐳: You are safe. (Sorry, the whale itself is in blue color)
- Start opencode with an appropriate folder (inside the container) by typing
opencode. - Sisyphus (GLM) will ask what to do.
8. Conclusion
I still rely on Claude for most of my day-to-day work, but I’ve been actively exploring the limits of this local agent setup to see where it makes sense. The most obvious drawback is speed. It is slower—not unusably slow, but noticeably so. For heavier planning or coding tasks, it often feels like it takes around five times longer than a hosted model. That said, the trade-off is autonomy. Once a task starts, the local agents tend to keep going steadily without much intervention, which lets me focus on other things. More than once, I’ve found myself working on something else and realizing the job is done only when the fans finally quiet down.
There are other benefits that are harder to ignore. I don’t need to think about token consumption, rate limits, or sudden model behavior changes. Everything is predictable and fully under my control. The main area that still needs work is context handling. In my setup, automatic compaction doesn’t behave as reliably as I’d like, and optimizing context length is still an open problem.
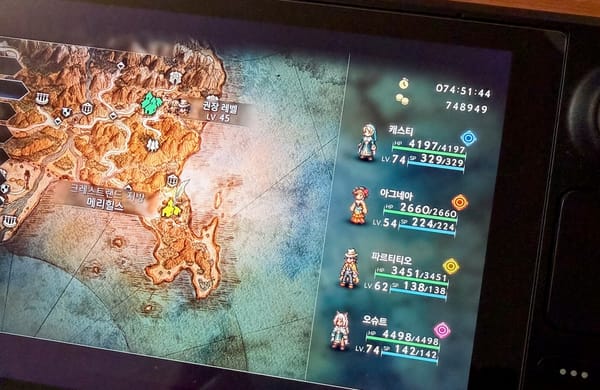
I’m currently using this environment for my weekend hobby project—to revive an old game project with the Godot engine. It’s a bit hacky (mainly because I don’t have much of the original material left), but even so, it’s already proving to be very promising. Having agents that can work locally, iterate patiently, and operate without constant supervision fits this kind of exploratory, reconstruction-heavy work surprisingly well.
This isn’t a replacement for cloud-based tools, at least not yet. But as a parallel environment, one that’s private, persistent, and surprisingly productive, it’s already useful. I hope some part of this setup helps if you’re experimenting with similar ideas.
Update
After publishing this post, I ran into a few practical issues.
For example, Qwen3-Coder-Next introduced frequent exceptions when handling structured output, which made me turned off continuous batching. Running GLM-4.7 alongside Kimi-K2.5 also turned out to be too aggressive, and it could easily run out of memory even with Kimi-K2.5 quantized to Q2.
I’m now experimenting with lighter models, such as Qwen3-Coder or DeepSeek, for roles like Sisyphus, while reserving GLM for Oracle and trying other combinations. I believe these trade-offs don’t show up in simple benchmarks and only become clear through real project use over time. I’ll share updates once I have more hands-on experience.