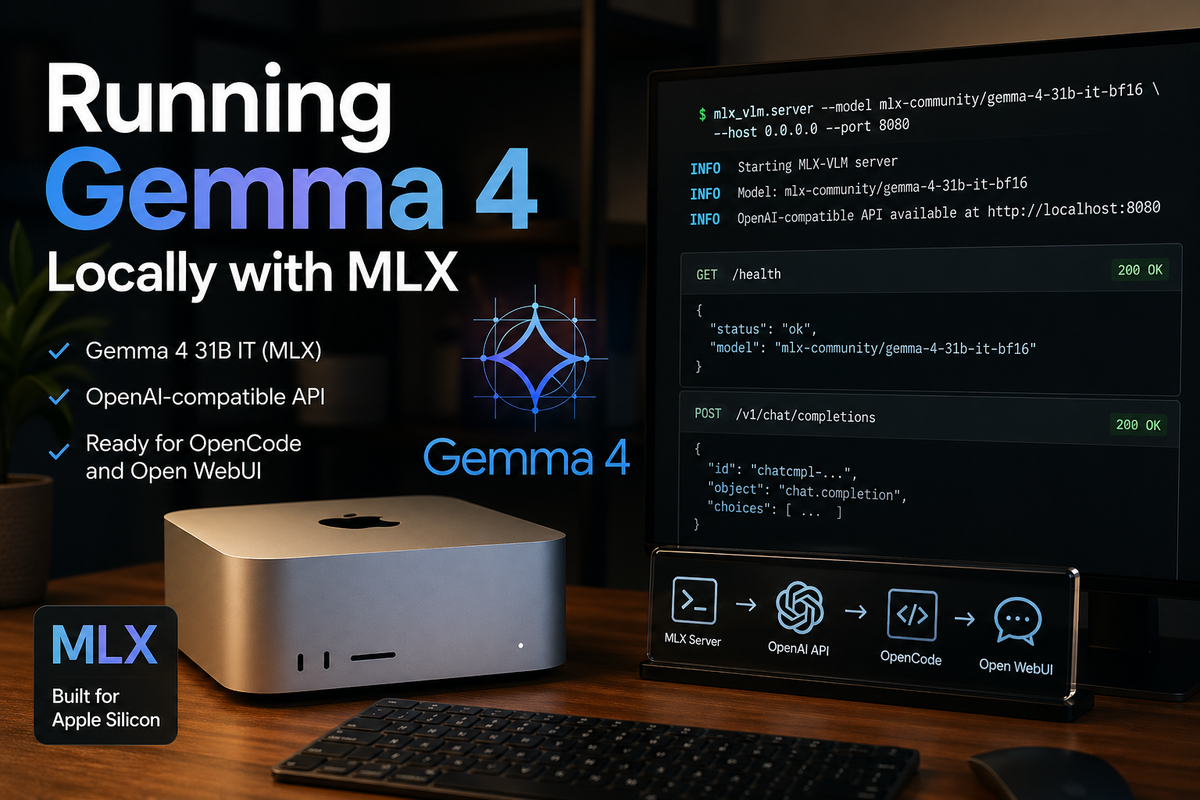
Running Gemma 4 Locally with MLX

In my previous post, I explored what it looks like to run coding agents with local LLMs on an M3 Ultra Mac Studio. That write-up was mostly about the environment itself: treating a single machine as something closer to personal infrastructure, capable of hosting multiple models and running them continuously without worrying about token costs or external APIs.
This post is also available on Medium. If you’re a paid Medium member and happen to read it there, it helps fund my next cup of coffee. Much appreciated ☕️😄
That setup was built mainly around llama.cpp, GGUF model files, and a small launcher script that let me start different local models with commands like llm kimi or llm qwen3-coder. It worked well, and it gave me a clean foundation for using OpenCode with local models.
This time, I want to extend that setup rather than replace it. The focus is narrower and more practical: how to run Gemma 4 locally using Apple’s MLX ecosystem, while keeping the same general workflow I already use for local models.
For this post, I used mlx-community/gemma-4-31b-it-bf16, the MLX-converted instruction-tuned version of Gemma 4 31B. I will explain that model choice in more detail below, but the short version is that it fits the kind of assistant-style workflow I want: local, OpenAI-compatible, and usable from tools like OpenCode or Open WebUI.
The goal here is not to compare Gemma 4 against cloud models or chase benchmark numbers. I’m more interested in whether this model can become part of a daily local workflow: easy to launch, accessible through an OpenAI-compatible API, usable from tools like OpenCode or Open WebUI, and stable enough that I do not have to constantly adjust or babysit it.
Why Gemma 4?
There are many open-weight models I could have used for this experiment. In the previous setup, I was already running models like Kimi, GLM, and Qwen through llama.cpp, mostly in GGUF format. That remains a very practical path, especially when the goal is to run large text models through a mature local inference server.
Gemma 4 interested me for a slightly different reason. It is a newer multimodal model family from Google, with support for long context, image understanding, instruction following, coding, and agentic workflows. In other words, it sits close to the kind of model I actually want to use with local tools: something that can participate in coding, reasoning, and document-style workflows without immediately forcing me back to a cloud API.
For this post, I chose mlx-community/gemma-4-31b-it-bf16. This is the MLX-converted version of Google’s Gemma 4 31B instruction-tuned model. The -it suffix matters because I am not trying to do raw text completion or continue pretraining. I want a model that behaves like an assistant when called from OpenCode, Open WebUI, or another OpenAI-compatible client.
The file size also matters. The BF16 MLX version of Gemma 4 31B is about 62.5GB, which is surprisingly manageable compared with some of the much larger models I used in the previous setup. For example, the GLM model files I experimented with were over 425GB. That difference changes the feeling of the setup. Gemma 4 31B is still a serious model, but it does not require treating the machine like a miniature data center just to keep the weights around.
That said, file size is not the same as runtime memory. A 62.5GB model does not mean it is comfortable on a 64GB machine. The operating system, MLX runtime, Python process, model buffers, and KV cache all need memory too, especially if you want to use a long context window. On a 64GB Mac, I would expect the BF16 31B model to be very tight or impractical. On a 128GB MacBook Pro, it becomes more plausible with conservative settings. On a Mac Studio with 512GB of unified memory, it becomes comfortable enough to experiment without constantly thinking about memory pressure.
This is one of the reasons Gemma 4 feels like a good fit for this machine. It is large enough to be interesting, but not so large that the entire setup becomes dominated by storage and memory management. The Mac Studio’s 512GB of unified memory gives enough headroom to run the model, leave room for context, and still keep the rest of the system usable.
There is another Gemma 4 model worth mentioning: the 26B A4B mixture-of-experts model. It has fewer active parameters per token and should be much faster in many cases. That may end up being the more practical daily driver for some workflows. But for this article, I wanted to start with the largest dense Gemma 4 model first, partly because it is easier to reason about and partly because it shows what this hardware can comfortably attempt.
One limitation is audio. Gemma 4 is a multimodal family, but not every size supports the same modalities. The 31B model supports text and image input, while audio support belongs to the smaller E2B and E4B models. For my use case, that tradeoff is acceptable. I am mainly interested in coding, chat, document-style reasoning, and possibly image understanding later. If audio were the main goal, I would choose a different Gemma 4 variant.
So the choice was not simply “Gemma 4 is the best model.” I do not think local model selection is that simple. The choice was more specific: Gemma 4 31B IT is large enough to be interesting, small enough to fit naturally into this machine, available in MLX format, and suitable for the assistant-style workflows I care about.
Why MLX?
In my previous setup, llama.cpp was the center of gravity. That made sense. It is mature, widely used, supports GGUF models, and provides an OpenAI-compatible server that works well with tools like OpenCode. If the goal is to run local text models across different machines and formats, llama.cpp is still one of the most practical choices.
MLX is a different path. Instead of being a general-purpose inference stack that happens to run on Apple Silicon, MLX is designed around Apple Silicon from the beginning. That distinction matters. Apple’s hardware does not separate CPU memory and GPU memory in the same way a typical NVIDIA setup does. The Mac Studio’s 512GB is unified memory, which means the CPU and GPU can work with the same memory pool instead of moving model data back and forth across a traditional device boundary.
That does not magically make Apple Silicon faster than a high-end NVIDIA GPU. It does not. For raw token throughput, dedicated NVIDIA hardware often wins. But MLX is interesting because it aligns with the Mac’s actual strengths: unified memory, low operational complexity, and the ability to keep large models resident on a single quiet workstation.
For this article, the specific tool I used is mlx-vlm. MLX itself is the underlying framework; mlx-vlm is the package that can load vision-language models and expose them through a local server. That distinction is useful because there are multiple MLX-based tools. For text-only language models, people often use mlx-lm. For multimodal models like Gemma 4, mlx-vlm is the more natural fit.
The practical appeal of mlx-vlm is that it gives me an OpenAI-style API around an MLX model. That means I can start the model locally and connect other tools to it without writing custom inference code. In the same way my previous setup used llama-server behind OpenCode, this setup uses mlx_vlm.server as another local model endpoint.
There are tradeoffs. llama.cpp still has a broader and more mature server surface. Its model listing, aliases, GGUF ecosystem, and OpenAI-compatible behavior are more polished. With mlx-vlm, I had to adjust a few expectations. For example, hitting the root URL in a browser returns Not Found, and the /models endpoint may not list a locally downloaded model in the way a llama.cpp user expects. The real test is whether /health works and whether /v1/chat/completions responds correctly.
Even with those rough edges, MLX feels worth exploring because it is native to the machine I am actually using. I am not trying to make this Mac pretend to be a small CUDA server. I am trying to use the hardware on its own terms. For a model like Gemma 4 31B, that makes the setup feel cleaner: MLX-format weights, an MLX runtime, and a local OpenAI-compatible endpoint that can be added alongside my existing llama.cpp servers.
Install MLX Tooling with uv
The official mlx-vlm installation path is simple:
pip install -U mlx-vlm
That is the command shown in the mlx-vlm README, and for a quick experiment it is perfectly fine. If you already have a clean virtual environment activated, it will install the package and give you commands such as mlx_vlm.generate, mlx_vlm.server, and mlx_vlm.chat_ui.
For this setup, though, I decided to use uv instead.
I wrote separately about why I now prefer uv for Python work on Apple Silicon Macs, so I will not repeat that whole argument here. The short version is that uv keeps Python tooling fast, isolated, and predictable. That matters even more when the tool is something I want to run repeatedly from the command line, not just import inside a single project.
In this case, mlx-vlm is not really a project dependency for me. It is closer to a local system tool, similar to llama-server. I want to type a command, start a model server, and leave it running. I do not want to remember which virtual environment is active, or accidentally install large ML dependencies into some unrelated project environment.
So instead of installing mlx-vlm into a manually created venv, I install it as a persistent uv tool:
uv tool install mlx-vlm
I also install the Hugging Face CLI the same way, because I use it to download the MLX model files:
uv tool install "huggingface_hub[cli]"
If this is the first time you are using uv tool install, make sure the uv tool directory is on your shell path:
uv tool update-shell
source ~/.zshrc
After that, the commands should be available directly:
mlx_vlm.server --help
hf --help
This gives me the behavior I want:
mlx-vlmlives in its own isolated tool environment.- Its dependencies do not mix with my projects.
- The command is still available globally.
- My launcher script can call
mlx_vlm.serverdirectly. - I do not need to manually activate a virtual environment before running the model.
This is similar in spirit to using pipx, but since the rest of my Python workflow has moved toward uv, it keeps the setup consistent.
If you do not already have uv, you can install it with Homebrew:
brew install uv
At this point, the MLX tooling is installed. The next step is to create a separate place for MLX-format model files, alongside the existing gguf folder from the previous setup.
A small note: in the later command section, I’d probably use hf download rather than huggingface-cli download, because newer Hugging Face docs and CLI examples tend to use hf.
Create an MLX Model Folder
In the previous setup, all GGUF models lived under a single gguf directory. Each model had its own folder, and each folder contained both the model files and a small config.toml file used by the launcher script.
For MLX models, I kept the same idea, but created a separate sibling directory called mlx:
~/dev/ai/models/
├── launch.py
├── launchmlx.py
├── gguf/
│   ├── kimi-k2.5/
│   ├── glm-4.7/
│   └── qwen3-coder/
└── mlx/
    └── gemma4/
        ├── config.toml
        └── model/
            ├── config.json
            ├── model-00001-of-00012.safetensors
            ├── model-00002-of-00012.safetensors
            ├── ...
            ├── tokenizer.json
            └── tokenizer_config.json
I used gemma4 as the local folder name because it is short and easy to type:
llmx gemma4
The actual Hugging Face model is still:
mlx-community/gemma-4-31b-it-bf16
The folder name is just my local alias. The important part is the nested model directory. I keep the downloaded Hugging Face files inside model/, while my own local config.toml stays one level above it.
That gives me this shape:
~/dev/ai/models/mlx/gemma4/config.toml
~/dev/ai/models/mlx/gemma4/model/config.json
~/dev/ai/models/mlx/gemma4/model/tokenizer.json
~/dev/ai/models/mlx/gemma4/model/model-00001-of-00012.safetensors
This layout matters because mlx-vlm expects the model path to point directly at the folder containing config.json. If I launch mlx_vlm.server with:
mlx_vlm.server --model ~/dev/ai/models/mlx/gemma4/model
then this file must exist:
~/dev/ai/models/mlx/gemma4/model/config.json
If it does not, mlx-vlm will fail with an error like:
Config not found at /Users/diko/dev/ai/models/mlx/gemma4/model
That error simply means the model files are not where the launcher says they are. It usually happens when the model was downloaded into the Hugging Face cache, or into an extra nested directory, instead of directly into model/.
To create the folder:
mkdir -p ~/dev/ai/models/mlx/gemma4/model
At this point the directory exists, but it is still empty. The next step is to download the actual MLX model files into that model/ folder.
Download the MLX Model Files
With the folder structure in place, the next step is to download the actual model files.
For this setup, I used:
mlx-community/gemma-4-31b-it-bf16
I found this model by searching Hugging Face rather than starting from a command line. This is usually how I look for local model variants, because the original model release is not always the one I actually want to run.
On Hugging Face, I searched for:
gemma-4-31b mlx
From there, I looked for a few specific clues:
- The repository owner should be something recognizable, such as
mlx-community. - The model name should include
gemma-4-31b. - For assistant/chat usage, the name should include
it, meaning instruction-tuned. - For this experiment, I wanted the BF16 version, so I looked for
bf16. - The model card should say it was converted to MLX format.
- The file list should include
config.json, tokenizer files, and.safetensorsshards.
That led me to:
mlx-community/gemma-4-31b-it-bf16
This is the MLX-converted, instruction-tuned BF16 version of Gemma 4 31B. The repository contains the files mlx-vlm expects, including config.json, tokenizer files, processor configuration, and the sharded .safetensors model weights.
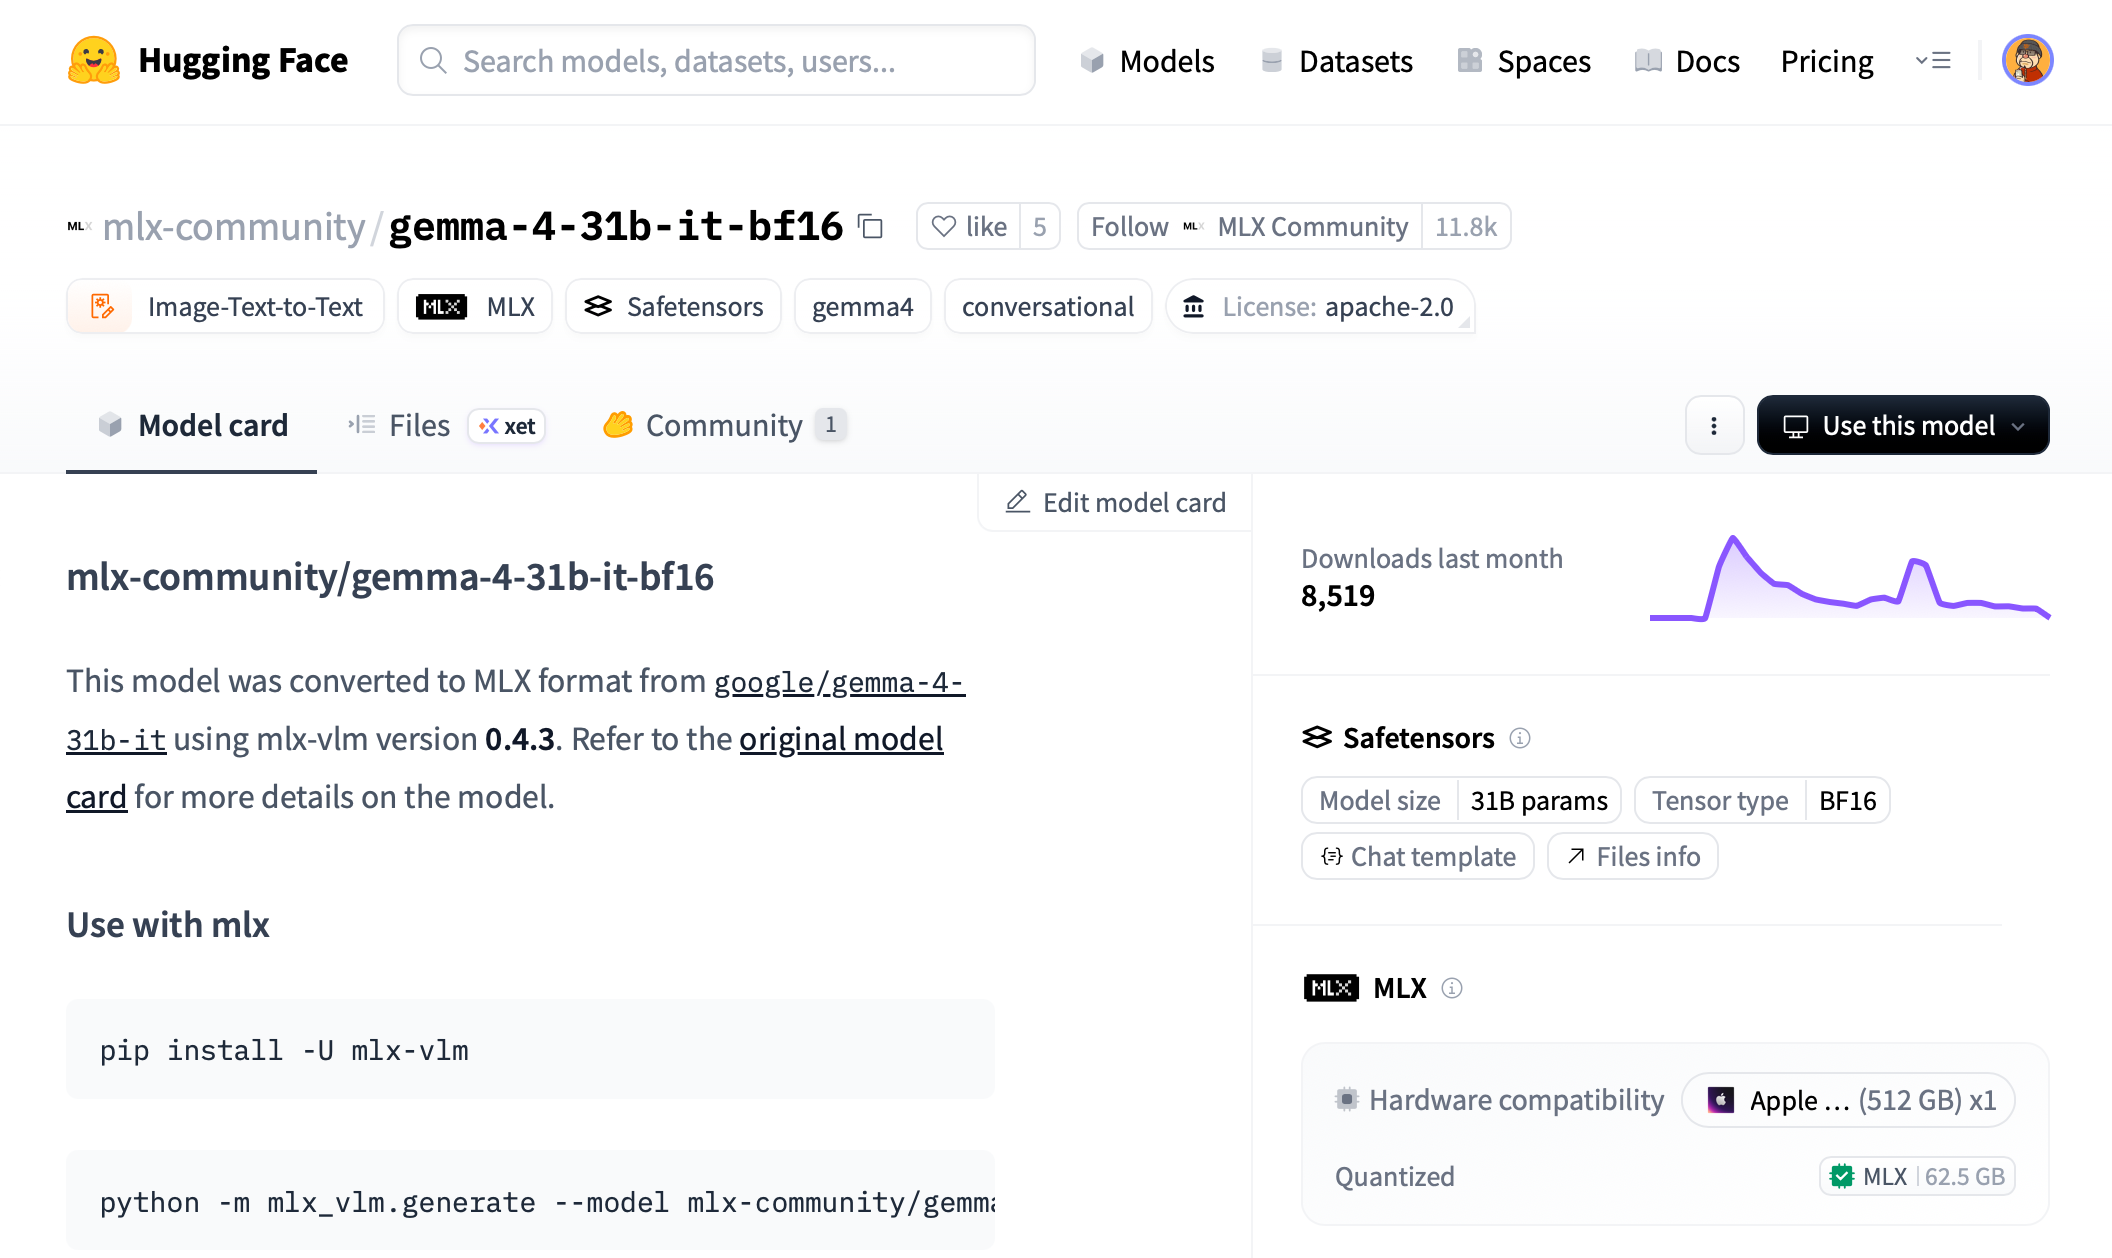
One thing worth paying attention to is the difference between these two repositories:
mlx-community/gemma-4-31b-bf16
mlx-community/gemma-4-31b-it-bf16
The first one is the base model. The second one is the instruction-tuned model. For this setup, I used the -it- version because I want the model to behave like an assistant when used from OpenCode, Open WebUI, or a chat interface.
Once I had the repository name, I used the Hugging Face CLI to download it.
Since I already installed the Hugging Face CLI with uv, I can use hf download:
hf download mlx-community/gemma-4-31b-it-bf16 \
  --local-dir ~/dev/ai/models/mlx/gemma4/model
This downloads the model directly into the folder that mlx-vlm will later load.
The file list is worth checking directly. On the model page, Hugging Face has a Files tab that shows exactly what is in the repository. For this model, the files are visible here: https://huggingface.co/mlx-community/gemma-4-31b-it-bf16/tree/main
After the download finishes, I check that config.json exists in the expected location:
ls ~/dev/ai/models/mlx/gemma4/model/config.json
I also usually check the model shards:
ls ~/dev/ai/models/mlx/gemma4/model/*.safetensors
For this model, the downloaded folder should look roughly like this:
~/dev/ai/models/mlx/gemma4/model/
├── config.json
├── generation_config.json
├── model-00001-of-00012.safetensors
├── model-00002-of-00012.safetensors
├── ...
├── model-00012-of-00012.safetensors
├── model.safetensors.index.json
├── processor_config.json
├── tokenizer.json
└── tokenizer_config.json
The exact file list may change slightly as the model repository is updated, but the important part is that config.json is directly inside the model/ folder. That is the path mlx-vlm uses to understand what kind of model it is loading.
One small thing to remember:hf downloadcan also download files into Hugging Face’s global cache. That is useful in many situations, but for this setup I prefer--local-dirbecause it keeps the model files next to my local configuration. The folder becomes self-contained and easier to reason about.
If the model is gated or Hugging Face requires authentication, log in first:
hf auth login
Then run the download command again.
The BF16 model is about 62.5GB, so the download may take a while. This is also another reason I prefer placing active models on the internal SSD rather than an external drive. The model only has to be downloaded once, but it will be loaded repeatedly, and fewer moving parts usually means fewer small annoyances later.
Add config.toml
The next piece is the local configuration file.
In my previous llama.cpp setup, each model folder had a config.toml file. That file described how the model should be launched: which port to use, how much context to allocate, what alias to expose, and which server flags to pass to llama-server.
I wanted the MLX setup to feel the same. Even though the underlying command is different, I still want to be able to describe each model with a small local config file and launch it by name.
For Gemma 4, I created:
~/dev/ai/models/mlx/gemma4/config.toml
with this content:
[server]
model_path = "model"

host = "0.0.0.0"
port = 8083

ctx_size = 131072
The model_path value points to the nested model/ directory created earlier:
~/dev/ai/models/mlx/gemma4/model
The launcher will resolve the relative path automatically. So from the model folder’s point of view, this:
model_path = "model"
becomes this:
~/dev/ai/models/mlx/gemma4/model
That is the directory passed to mlx_vlm.server with --model.
The host and port settings are straightforward:
host = "0.0.0.0"
port = 8083
I use 0.0.0.0 because I often connect to local model servers from tools running in Docker. For example, OpenCode or Open WebUI may use:
http://host.docker.internal:8083/v1
If I only wanted to access the server from the same macOS host, 127.0.0.1 would also be fine.
The ctx_size value maps to mlx_vlm.server’s --max-kv-size option:
ctx_size = 131072
I started with ~128K because it is large enough for agentic and document-style workflows, but still conservative compared with Gemma 4’s maximum context. With 512GB of unified memory, there is room to experiment with larger values later, but I prefer to begin with a setting that leaves plenty of headroom.
The equivalent command generated from this config is roughly:
mlx_vlm.server \
  --model ~/dev/ai/models/mlx/gemma4/model \
  --host 0.0.0.0 \
  --port 8083 \
  --max-kv-size 131072
I also left room for optional MLX-specific settings:
[server]
model_path = "model"

host = "0.0.0.0"
port = 8083
ctx_size = 131072

# Optional tuning
# kv_bits = 8
# kv_quant_scheme = "uniform"
# kv_group_size = 64
# vision_cache_size = 100
# log_level = "INFO"
For the first run, I kept the config minimal. The important thing is to make sure the model path, port, and context size are explicit. Once the server starts correctly and the model responds, it is easier to tune the rest.
Create launchmlx.py
At this point, the model files are downloaded and the config.toml file describes how I want to run the server. I could start the model directly with mlx_vlm.server, but I wanted to keep the same pattern from my previous setup.
For GGUF models, I already had a launcher script that let me run commands like:
llm qwen3-coder
llm kimi
llm glm
For MLX models, I wanted the equivalent to be:
llmx gemma4
So I created a second launcher script:
~/dev/ai/models/launchmlx.py
The job of this script is intentionally small:
- Take a model folder name, such as
gemma4. - Read
~/dev/ai/models/mlx/gemma4/config.toml. - Resolve the model path.
- Convert the TOML settings into
mlx_vlm.serverflags. - Replace itself with the actual server process.
Here is the script:
#!/usr/bin/env python3
import argparse
import os
import sys
import tomllib

BASE_DIR = os.path.dirname(os.path.abspath(__file__))
MLX_DIR = os.path.join(BASE_DIR, "mlx")


def load_config(model_name):
    model_path = os.path.join(MLX_DIR, model_name)
    config_file = os.path.join(model_path, "config.toml")

    if not os.path.exists(config_file):
        print(f"X Error: Config file not found at {config_file}")
        sys.exit(1)

    with open(config_file, "rb") as f:
        config = tomllib.load(f)

    return config, model_path


def build_command(config, model_folder):
    server_conf = config.get("server", {})

    model_ref = server_conf.get("model_path") or server_conf.get("model_repo")
    if not model_ref:
        print("X Error: 'model_path' or 'model_repo' missing in config.toml")
        sys.exit(1)

    if not model_ref.startswith(("/", "mlx-community/", "google/")):
        model_ref = os.path.join(model_folder, model_ref)

    cmd = ["mlx_vlm.server", "--model", model_ref]

    args_map = {
        "host": "--host",
        "port": "--port",
        "ctx_size": "--max-kv-size",
        "max_kv_size": "--max-kv-size",
        "kv_bits": "--kv-bits",
        "kv_quant_scheme": "--kv-quant-scheme",
        "kv_group_size": "--kv-group-size",
        "vision_cache_size": "--vision-cache-size",
        "log_level": "--log-level",
    }

    for key, value in server_conf.items():
        if key in {"model_path", "model_repo"}:
            continue

        if key == "trust_remote_code":
            if value:
                cmd.append("--trust-remote-code")
            continue

        flag = args_map.get(key)
        if flag:
            cmd.extend([flag, str(value)])

    return cmd


def main():
    parser = argparse.ArgumentParser(description="Launch a local MLX-VLM model from config.")
    parser.add_argument("model", help="Folder name inside mlx/")
    args = parser.parse_args()

    config, path = load_config(args.model)
    cmd = build_command(config, path)

    print(f">> Loading MLX configuration for: {args.model}...")
    print(f"> Context: {path}")
    print(f"> Command: {' '.join(cmd)}")
    print("-" * 40)

    try:
        os.execvp("mlx_vlm.server", cmd)
    except FileNotFoundError:
        print("X Error: 'mlx_vlm.server' not found in PATH.")
        print("   Run: uv tool install mlx-vlm")


if __name__ == "__main__":
    main()
Then I added an alias to ~/.zshrc:
alias llmx="python ~/dev/ai/models/launchmlx.py"
After reloading the shell config:
source ~/.zshrc
I can launch the model with:
llmx gemma4
This is why the script does not need to be executable. The alias invokes it through Python directly, so the file only needs to exist and be readable.
The script supports two styles of model reference.
The local-folder style:
[server]
model_path = "model"
This resolves to:
~/dev/ai/models/mlx/gemma4/model
And the Hugging Face repo style:
[server]
model_repo = "mlx-community/gemma-4-31b-it-bf16"
The local-folder style is the one I use in this post because I want the model files to live beside the config file. The repo style can be useful if you prefer to let mlx-vlm and Hugging Face’s cache handle model resolution.
One difference from my llama.cpp launcher is that there is no alias field here. llama-server supports --alias, which is convenient because clients can send a short model name. I did not find the same alias behavior in mlx_vlm.server, so for API clients I use the actual model path or repo ID as the model name. That detail becomes important later when connecting OpenCode or Open WebUI.
Run the MLX Server
With the model files, config file, launcher script, and shell alias in place, I can start Gemma 4 with one command:
llmx gemma4
That command reads:
~/dev/ai/models/mlx/gemma4/config.toml
and turns it into a mlx_vlm.server command similar to this:
mlx_vlm.server \
  --model ~/dev/ai/models/mlx/gemma4/model \
  --host 0.0.0.0 \
  --port 8083 \
  --max-kv-size 131072
On startup, mlx-vlm prints server logs and then starts loading the model. For a model this size, loading is not instant. The first run can take some patience, especially if the model files are on external storage or the OS is still warming up file caches.
A successful startup should include logs along these lines:
INFO:     Started server process [...]
INFO:     Waiting for application startup.
Preloading model: /Users/diko/dev/ai/models/mlx/gemma4/model
Loading model from: /Users/diko/dev/ai/models/mlx/gemma4/model
If the model path is wrong, one of the most common errors is:
Config not found at /Users/diko/dev/ai/models/mlx/gemma4/model
In my case, that meant mlx-vlm was looking for:
/Users/diko/dev/ai/models/mlx/gemma4/model/config.json
but the file was not there. The fix was to make sure the Hugging Face files were downloaded directly into the model/ directory:
hf download mlx-community/gemma-4-31b-it-bf16 \
  --local-dir ~/dev/ai/models/mlx/gemma4/model
and then confirm:
ls ~/dev/ai/models/mlx/gemma4/model/config.json
Once the server is running, the root URL is not very useful:
http://localhost:8083/
In my browser, that returns:
Not Found
That is normal. mlx_vlm.server is an API server, not a full web interface. The useful endpoint for checking whether the server is alive is:
curl http://localhost:8083/health
The response should show that the server is healthy and that a model is loaded:
{
  "status": "healthy",
  "loaded_model": "/Users/diko/dev/ai/models/mlx/gemma4/model",
  "continuous_batching_enabled": true
}
There is also a models endpoint:
curl http://localhost:8083/v1/models
or:
curl http://localhost:8083/models
In my setup, this returned an empty list. That was a little surprising at first, because I was used to llama.cpp exposing the loaded model more directly. With mlx-vlm, an empty models list does not necessarily mean the server failed. The endpoint may scan Hugging Face’s cache rather than the local folder I passed with --model.
So for this setup, I treat /health as the server check, and /v1/chat/completions as the real functional test. The empty /models response is something to remember later when connecting clients like Open WebUI. It means I may need to manually enter the model ID instead of relying on automatic discovery.
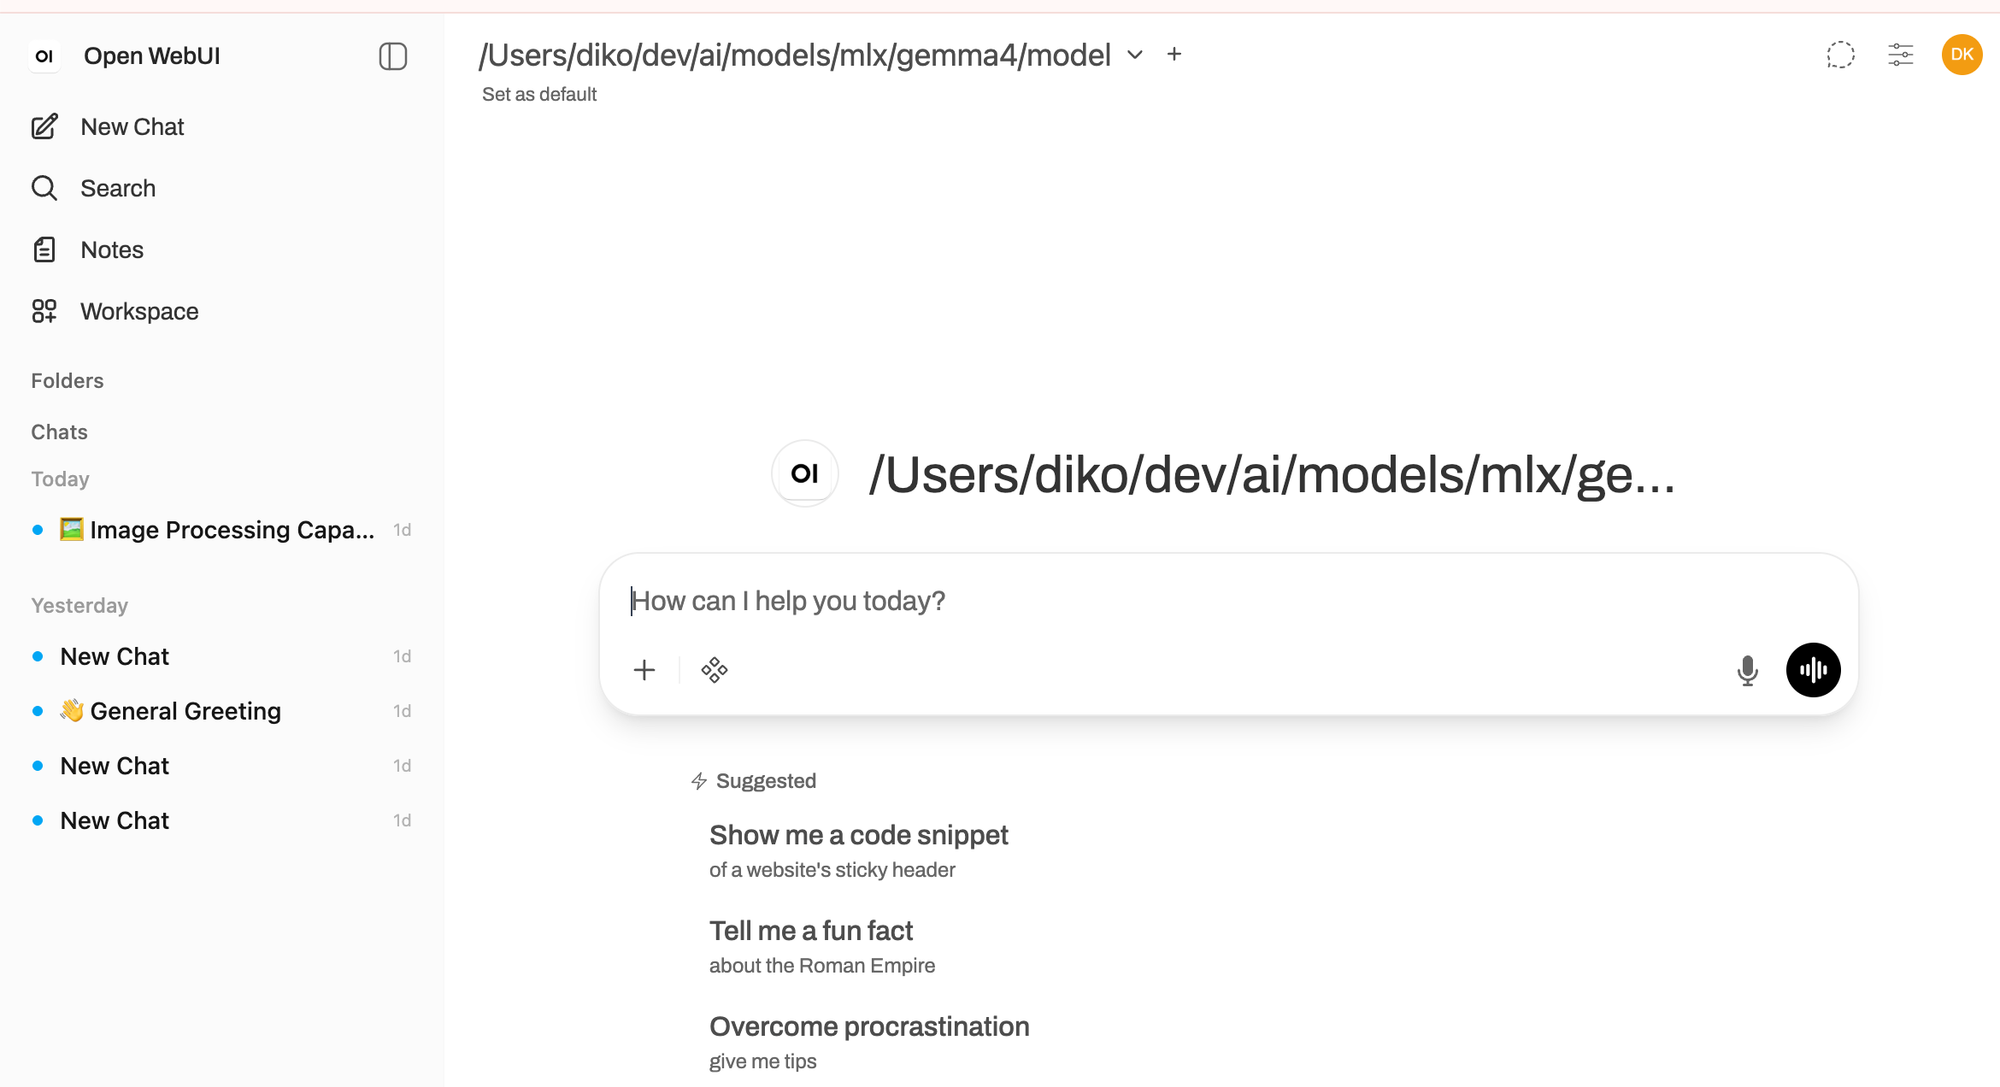
Connect Open WebUI
After confirming that mlx_vlm.server was running, I wanted a simple way to talk to the model in a browser.
mlx-vlm does include its own chat UI:
mlx_vlm.chat_ui --model ~/dev/ai/models/mlx/gemma4/model
That is useful for quick testing, but I also wanted to connect the model to the same kind of interface I use with other local models. For that, Open WebUI is a good fit because it can talk to OpenAI-compatible APIs.
In this setup, mlx_vlm.server is the model server, and Open WebUI is the client:
Open WebUI -> mlx_vlm.server -> Gemma 4
Since I started mlx_vlm.server on port 8083, the OpenAI-compatible base URL is:
http://localhost:8083/v1
If Open WebUI is running in Docker, the URL usually needs to be:
http://host.docker.internal:8083/v1
In Open WebUI, I added a new OpenAI-compatible connection and pointed it at that URL.
One small issue is model discovery. In my setup, the /models endpoint returned an empty list. That does not mean the server failed; /health still showed the model as loaded, and /v1/chat/completions worked. It just means Open WebUI may not automatically discover the model name.
Because of that, I manually added the model ID in Open WebUI’s model filter. Since I launched the server with the local model path, the model ID I used was:
/Users/diko/dev/ai/models/mlx/gemma4/model
That part is important. With mlx-vlm, the model field in the API request is not just a display label. It is used to identify what model should be loaded. If the server was launched with a local path, then using the same local path as the model ID avoids confusion.
After that, Open WebUI could send chat requests to the local Gemma 4 server. At this stage, that was enough. I had a local MLX model running behind an OpenAI-compatible API, and a browser UI that could talk to it.
Conclusion
This setup is not a replacement for the llama.cpp workflow I described in the previous post. It is more like an extension of the same idea.
The previous setup gave me a practical way to run GGUF models with llama-server, organize them with config.toml, and launch them with short commands like:
llm kimi
llm qwen3-coder
This MLX setup keeps that pattern, but adds a parallel path for MLX-format models:
llmx gemma4
That symmetry matters to me. I do not want every local model runtime to become its own little ceremony. If a model is going to become part of my daily environment, it needs to fit into the same operational shape: model files in a predictable place, a small config file, one command to start the server, and an OpenAI-compatible endpoint that other tools can use.
Gemma 4 31B with MLX is interesting because it fits that shape better than I expected. The model is large enough to be meaningful, but the MLX BF16 files are still manageable on a high-memory Mac Studio. mlx-vlm has some rough edges compared with llama.cpp, especially around model discovery and server polish, but the core workflow works: install the tooling, download the model, start the server, check /health, and connect a client.
For now, I am treating Open WebUI as the first integration point. It gives me a simple way to interact with the model, check behavior manually, and make sure the OpenAI-compatible API path is working. I have not connected this MLX/Gemma setup to OpenCode yet.
That is the next step, but I want to be deliberate about it. I am currently working on a small framework to assess the ability and performance of local LLMs more systematically. Before I use Gemma 4 inside OpenCode, or inside my own agentic framework, I want a better sense of where it is strong, where it struggles, and how it behaves under repeated local workloads.
That is the broader direction for this setup. The Mac Studio is not just a machine that can load big models. It is becoming a local testbed: a place where I can run different model families, compare runtimes, evaluate behavior, and eventually decide which models belong in which roles.
For this post, the important result is narrower but still useful: Gemma 4 31B IT can run locally on Apple Silicon through MLX, it can expose an OpenAI-compatible API through mlx-vlm, and it can be used from Open WebUI with only a small amount of configuration. That is enough to make it part of the local model toolbox. It was also another great weekend side project: small enough to finish, practical enough to keep, and just open-ended enough to suggest the next one.